RAID Reconstructor:
321Soft Data Recovery is the best choice for getting your data back, now includes a powerful RAID Reconstructor. You can also use this option to reconstruct broken RAID systems or lost RAID for recovering data on Mac. 321Soft Mac Data Recvery is the only product with this powerful tool in the industry. Reconstructing damaged or broken RAID arrays is a very complicated process, but 321Soft makes it quite simple, you won't believe it.
This is especially useful when the controller has stopped working, but the drives are still working. You simply attach the drives to a system and reconstruct the RAID systems and recover data!
You can easily rebuild broken RAID systems on Mac by following the steps mention below:
Awards:


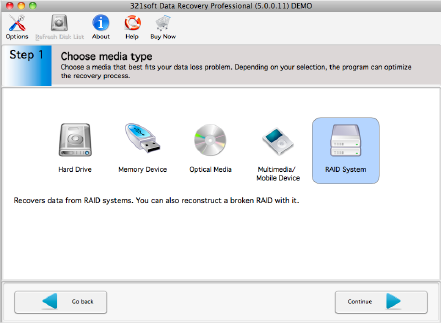
The first step is to choose a media that best fits your data loss problem.
To recover data from RAID systems, please click on the "RAID system" icon,
and click on the "Continue" button.


If you chose a RAID System in Step 1, you may also have the option to try to reconstruct a broken RAID.
Here, you can select the type of RAID and number of drives, and let the RAID Reconstructor analyze the data and try to reconstruct the RAID for data recovery.
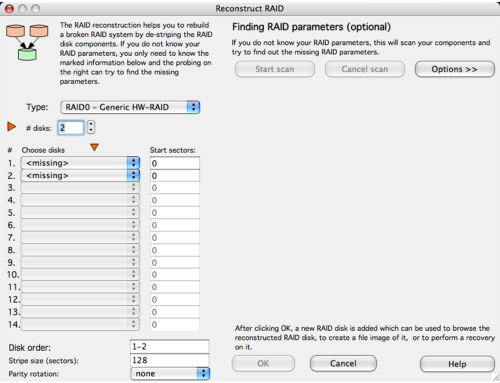
First, you choose what kind of RAID you are reconstructing. There are some common preset RAID types in the list. If your RAID type is not listed, choose the generic RAID that matches the type of RAID you have (HW, SW, RAID0, RAID5).
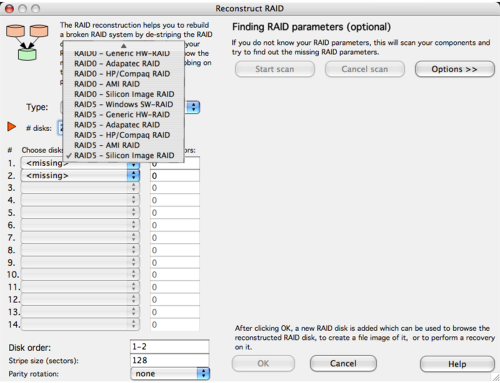
Then select how many drives are in the RAID. If possible, choosing the drives in the correct order will speed up the analysis. Make sure you choose the only the disks that contain the RAID or the analysis will fail.
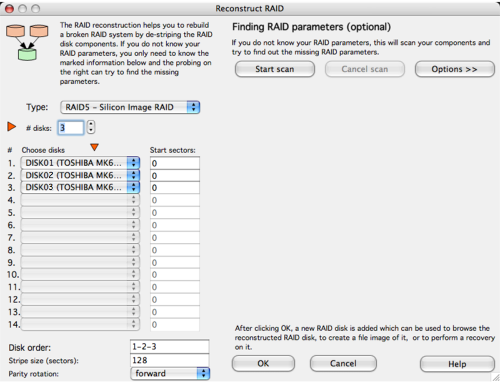
If you are unsure of the disk order, then click the "Options >>" button and put a check in the box called Disk Order. This will also parse different orders of the drives in the RAID.
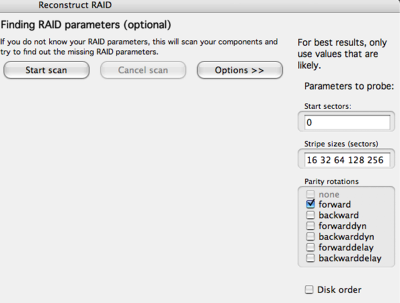
Once you have set the parameters, then click on the "Start Scan" button to allow the RAID Reconstructor to analyze the disks.
As the scan probes the various combinations of data on the RAID, they will be listed in order of probability in the Probed Combinations list.
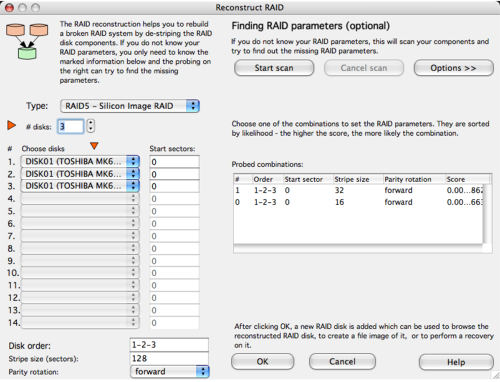
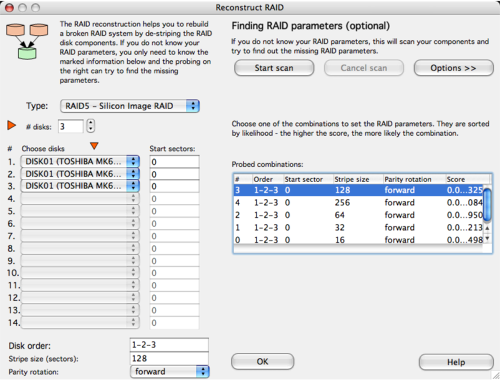
When the scan finishes, you will be shown the list of probed combinations for your RAID. The higher the score, the more likely that it is the correct combination. This is not always going to be the case, but will be a good place to start when reconstructing your RAID.
Click on one of the probe combinations and then click OK to try and view your RAID..
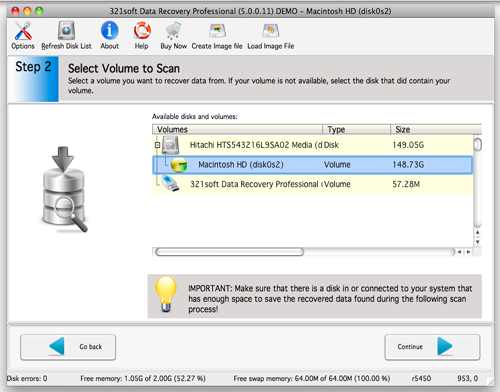
Your RAID will be displayed as the RAID and then the partitions will be listed below that. If the RAID indeed had valid partitions on it before it was broken, then these partitions should be able to be browsed and scanned just like a volume, and the data saved. See section above on choosing your disk or volume to scan.
If you cannot browse the partitions on the RAID, then the parameters for the reconstruction are not correct. However, you can very easily go back and adjust the parameters without rescanning. Highlight the RAID in the disk list, and click the Details button. This will return you to the RAID Reconstructor screen.
Here, you can choose another probed combination, and click OK until you find a combination that allows you to browse the RAID partitions. For assistance in trying different combinations, you can sort the columns in the probed combinations list.
Advanced users can manually adjust the parameters on the left by simply entering the data - Start sectors, Disk order, Stripe size, and Parity rotation. Then click OK to try to browse the reconstructed RAID.

Ready to recover data from RAID systems? Just click the button below and begin reconstruct a broken RAID!
Absolutely the Easiest Way to Recover Mac Raid
Ready to recover your Raid data? Download the Free version Now!

